Basic Setup
These instructions will set up the user PC and robot for basic communication. Further setup will depend on the chosen networking configuration.
1. User PC
Installing ROS 2
To interface with the robot, it is recommended to use a remote PC running the appropriate version of Ubuntu Desktop, with ROS 2 installed.
- Warning
ROS 2 Galactic is no longer supported. Please consider upgrading to a newer release
Required OS: Ubuntu 20.04
Follow these instructions to install ROS 2 Galactic on your PC.
Once ROS 2 is installed, install
turtlebot4_desktop:sudo apt update && sudo apt install ros-galactic-turtlebot4-desktop -
Required OS: Ubuntu 22.04
Follow these instructions to install ROS 2 Humble on your PC.
Once ROS 2 is installed, install
turtlebot4_desktop:sudo apt update && sudo apt install ros-humble-turtlebot4-desktop -
Required OS: Ubuntu 24.04
Follow these instructions to install ROS 2 Jazzy on your PC.
Once ROS 2 is installed, install
turtlebot4_desktop:sudo apt update && sudo apt install ros-jazzy-turtlebot4-desktop
2. Robot
The first step for setting up the TurtleBot 4 is to power it on and connect it to your Wi-Fi network.
Power on the robot
Place the TurtleBot 4 onto its dock. The green LED on the dock will turn on for a few seconds, and the TurtleBot 4 should power on. Allow the robot some time to boot up.
For more details on the robot buttons and indicator lights, visit the Create®3 Documentation
Connect to the Access Point
On the first boot, the Raspberry Pi will enter Access Point (AP) mode which will allow you to connect to it over Wi-Fi. On your PC, connect to the Turtlebot4 Wi-Fi network. The password is also Turtlebot4.
The TurtleBot 4 AP network is a 5GHz network. Your computer will need to support 5GHz Wi-Fi to connect to the network.
SSH into the Raspberry Pi
Once connected, you can SSH into the Raspberry Pi to configure its Wi-Fi. Open a terminal on your PC and call:
ssh ubuntu@10.42.0.1
Log in using the password turtlebot4.
Connect the Raspberry Pi to your network
Once logged in, configure the Raspberry Pi to connect to your Wi-Fi network.
Connect the Raspberry Pi to a 5GHz Wi-Fi network for optimal performance.
- Warning
ROS 2 Galactic is no longer supported. Please consider upgrading to a newer release
In your SSH session, call:
sudo wifi.sh -s '<WIFI_SSID>' -p '<WIFI_PASSWORD>' -r <REGULATORY_DOMAIN> && sudo rebootNoteThe Regulatory Domain is based on the country you live in. USA:
US, Canada:CA, UK:GB, Germany:DE, Japan:JP3, Spain:ES. For a full list, click here. -
In your SSH session, run the TurtleBot 4 setup tool:
turtlebot4-setupThis will start the TurtleBot 4 setup tool. Navigate to the "Wi-Fi Setup" menu and configure your connection. When you have finished, save the wifi settings, then return to the main menu. Select
Apply Settingsand pressEnterbefore quitting theturtlebot4-setuptool.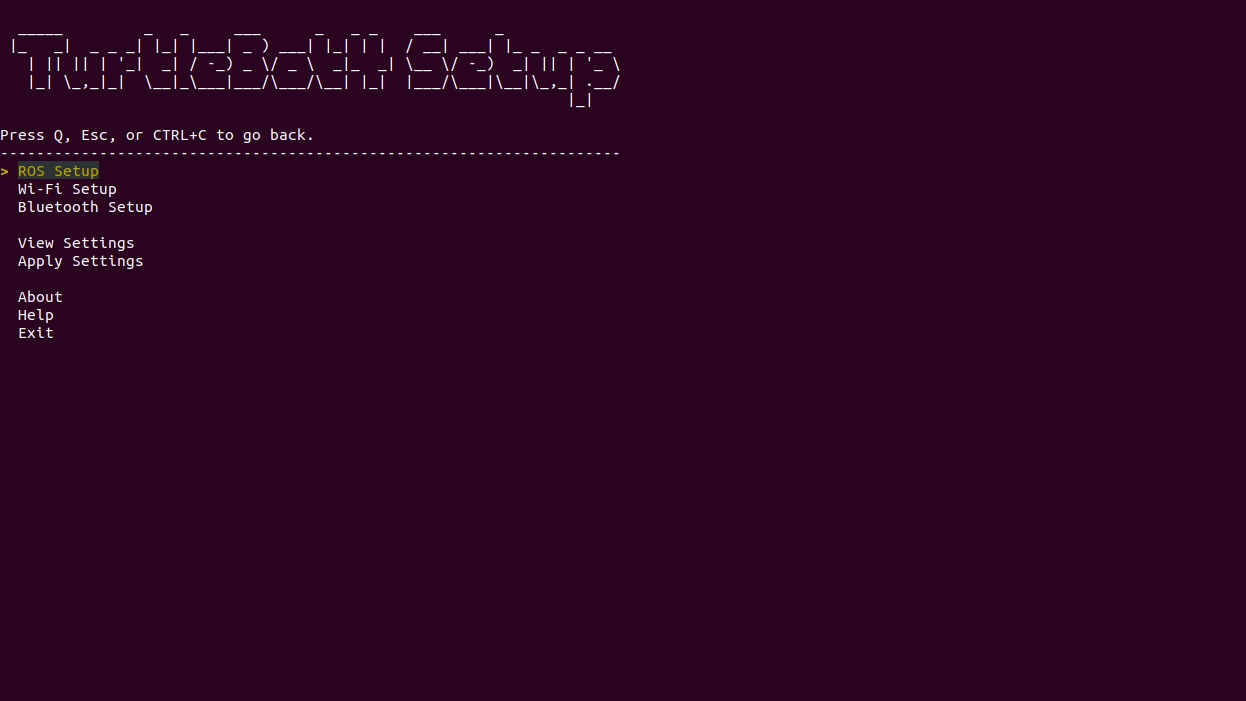
Wi-Fi Setup using the TurtleBot 4 Setup tool NoteChange your Wi-Fi mode to ‘Client’ when connecting to an existing network.
-
In your SSH session, run the TurtleBot 4 setup tool:
turtlebot4-setupThis will start the TurtleBot 4 setup tool. Navigate to the "Wi-Fi Setup" menu and configure your connection. When you have finished, save the wifi settings, then return to the main menu. Select
Apply Settingsand pressEnterbefore quitting theturtlebot4-setuptool. Wi-Fi Setup using the TurtleBot 4 Setup tool NoteChange your Wi-Fi mode to ‘Client’ when connecting to an existing network.
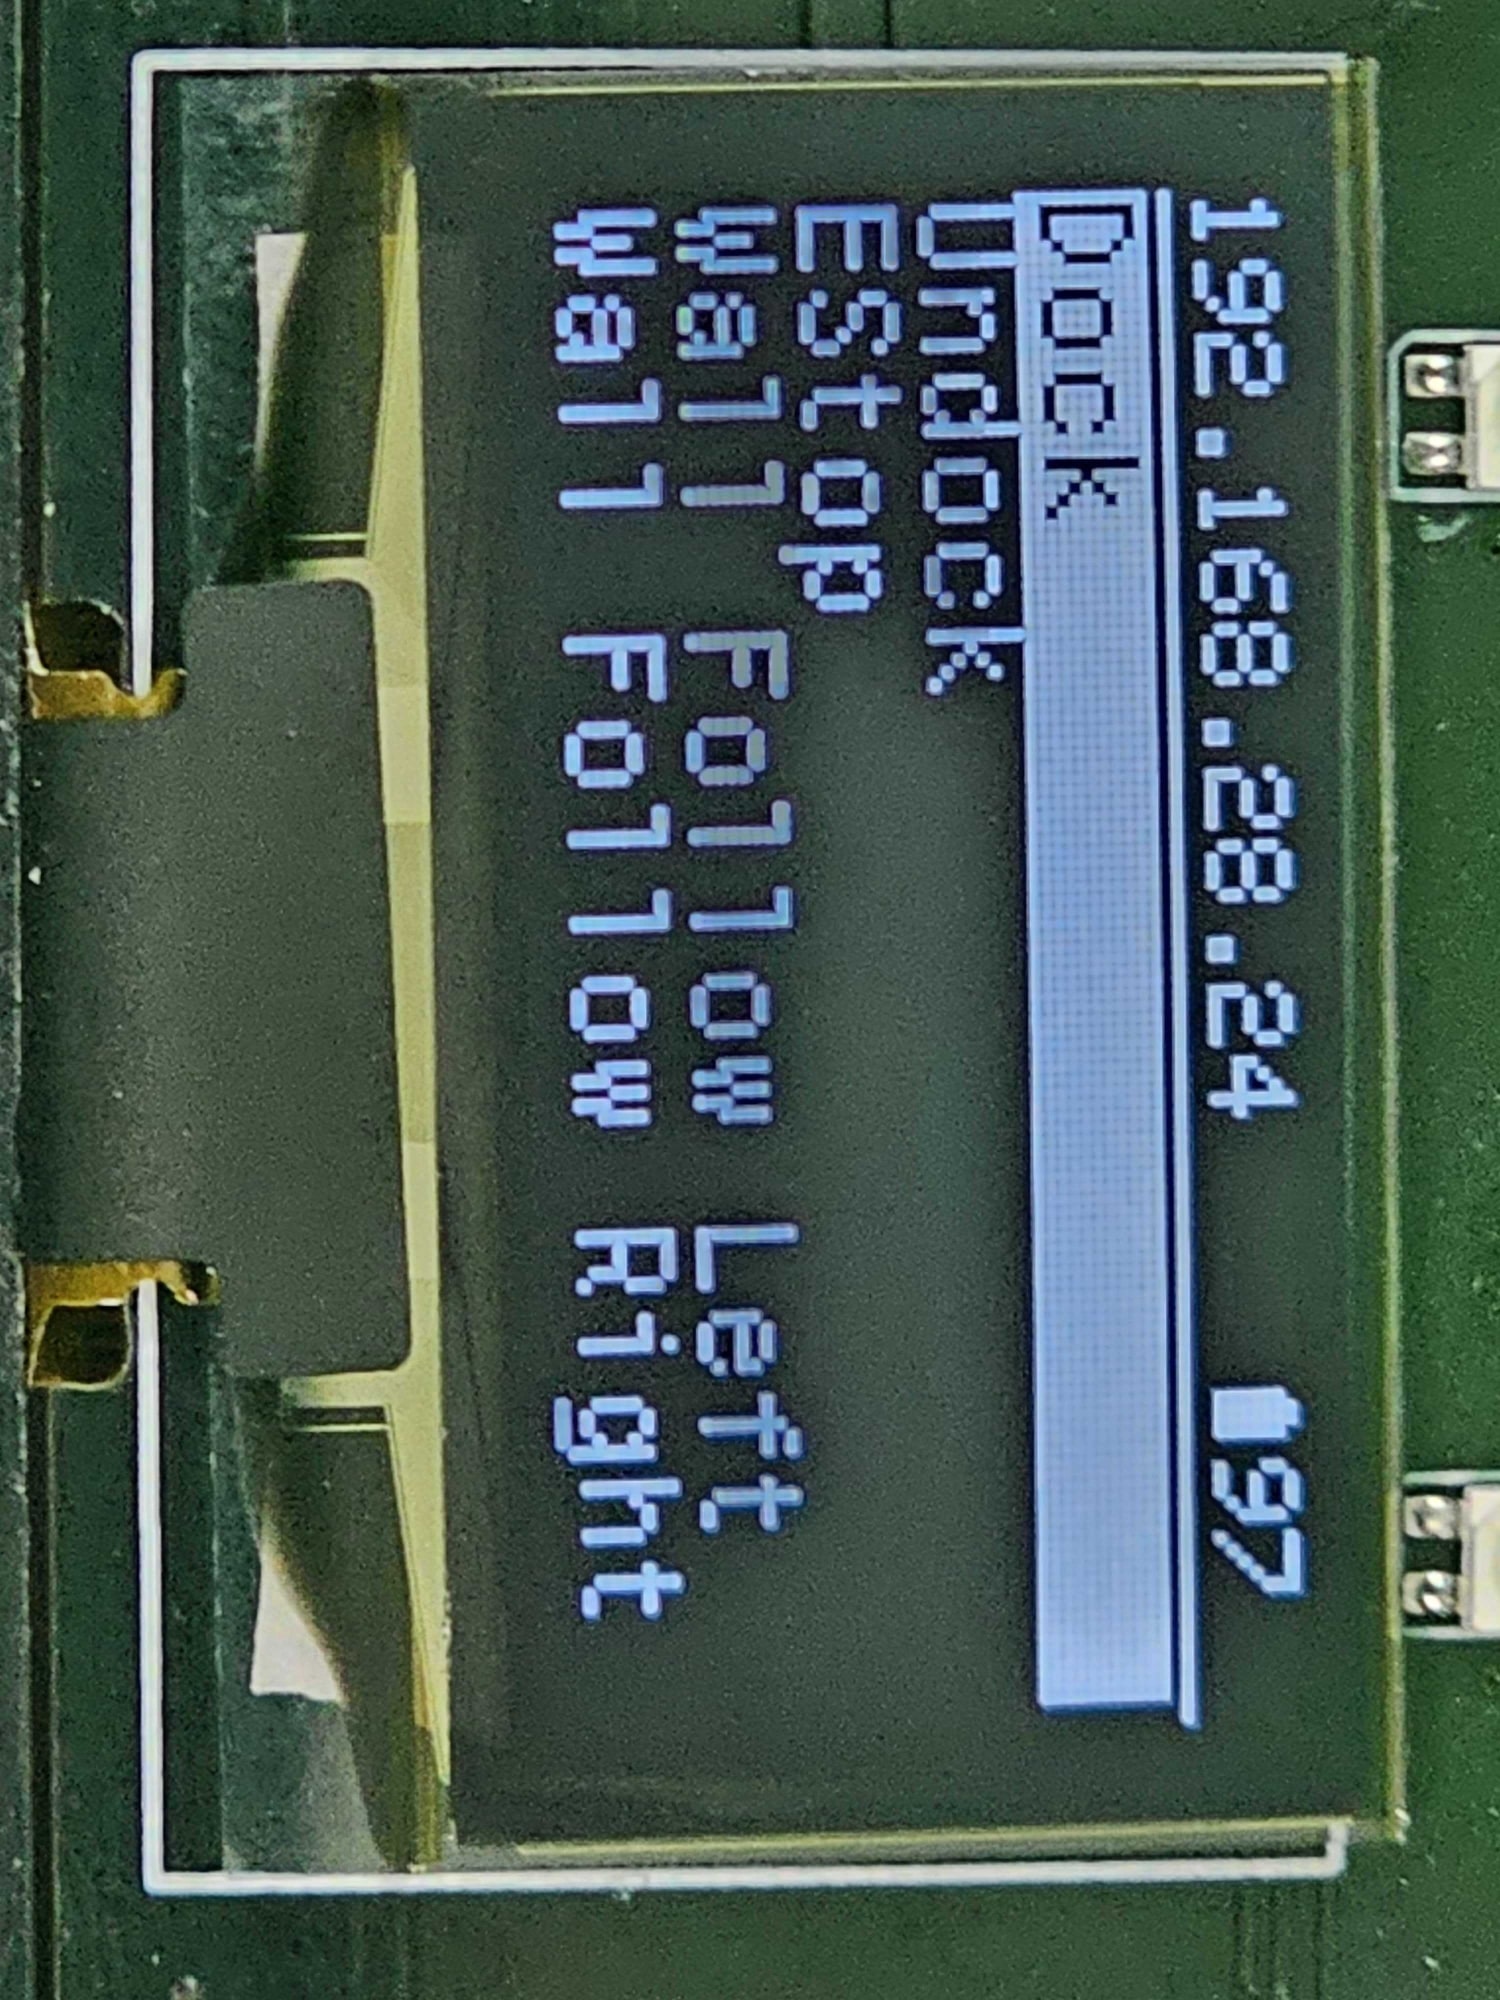
Find the new Raspberry Pi IP
Once the Wi-Fi settings are applied, the Raspberry Pi will reboot and connect to your network. DHCP will assign it a new IP address. On the TurtleBot 4, this IP address will be shown at the top of the display.
For the TurtleBot 4 Lite, you will need to check the /ip topic for the new address.
- Warning
ROS 2 Galactic is no longer supported. Please consider upgrading to a newer release
On your PC, run the following commands:
source /opt/ros/galactic/setup.bash export RMW_IMPLEMENTATION=rmw_cyclonedds_cpp export ROS_DOMAIN_ID=0 ros2 topic echo /ip -
On your PC, run the following commands:
source /opt/ros/humble/setup.bash export RMW_IMPLEMENTATION=rmw_fastrtps_cpp export ROS_DOMAIN_ID=0 ros2 topic echo /ip -
On your PC, run the following commands:
source /opt/ros/jazzy/setup.bash
export RMW_IMPLEMENTATION=rmw_fastrtps_cpp
export ROS_DOMAIN_ID=0
ros2 topic echo /ip
You should see the IP address printed out in your terminal periodically.
$ ros2 topic echo /ip
data: 192.168.28.24
---
data: 192.168.28.24
---
If you are unable to find the IP address with the previous methods, try logging into your gateway and looking for a device with host name “ubuntu”.
Once you have found the IP address, you can now SSH back into the robot with it.
ssh ubuntu@192.168.28.24
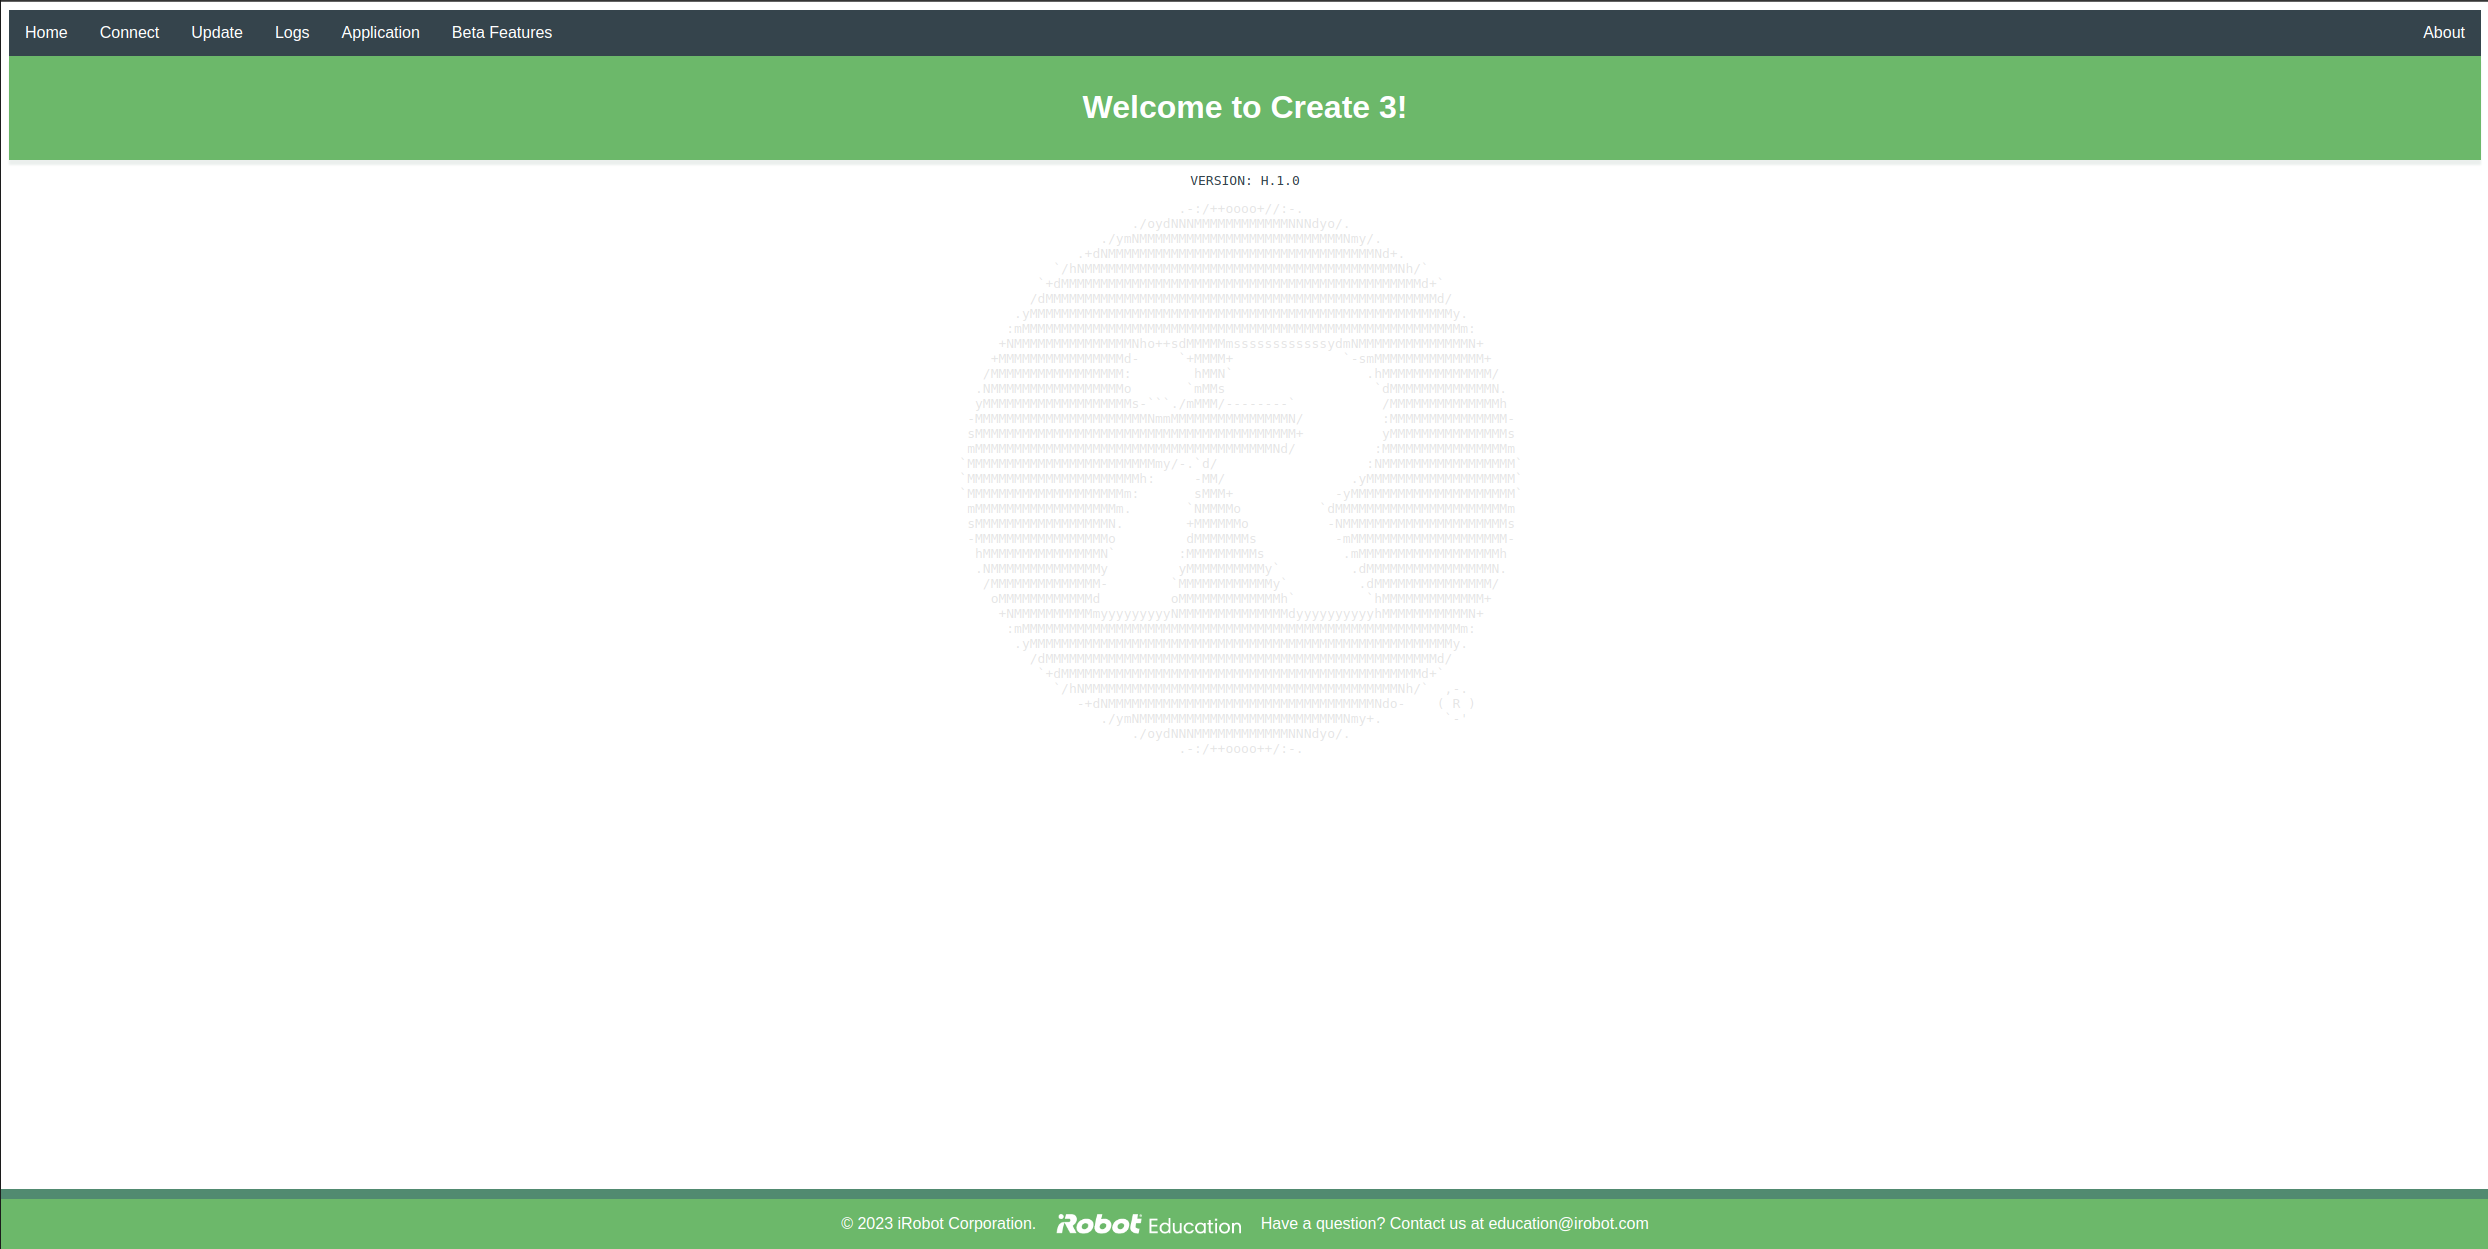
Accessing the Create® 3 webserver
Once you have acquired the Raspberry Pi IP address, you can access the Create® 3 webserver.
Open a web browser and navigate to your Raspberry Pi IP with the port 8080.

You will be greeted by the Create® 3 webserver home page.
Updating the TurtleBot 4
It is recommended to update both the Create® 3 and the Raspberry Pi when you first use it to receive the latest bug fixes and improvements.
Create® 3
Check the Create® 3 software releases to see if a newer firmware version is available. You can check the firmware version of your Create® 3 by visiting the webserver.
- Warning
ROS 2 Galactic is no longer supported. Please consider upgrading to a newer release
NoteIf you are using ROS 2 Galactic, make sure you install firmware with version
G.*.*; firmware versions starting withHorIare not compatible with Galactic. - Note
If you are using ROS 2 Humble, make sure you install firmware with version
H.*.*; firmware versions starting withGorIare not compatible with Humble. - Note
If you are using ROS 2 Jazzy, make sure you install firmware with version
I.*.*; firmware versions starting withGorHare not compatible with Jazzy.WarningUnlike previous versions, the Create® 3 firmware
I.*.*does not support switching between FastDDS and CycloneDDS. Instead there are two separate versions of the firmware available, each supporting one RMW implementation. When installing the firmware on your Create® 3 you must use the firmware that corresponds to the middleware you intend to use.For ROS 2 Jazzy, the default is FastDDS. Unless you have specific reasons for using CycloneDDS, it is recommended to use the FastDDS firmware on your Create® 3.
If new firmware is available, download it, then access the webserver. Go to the Update tab, upload the firmware, then update your robot.
Raspberry Pi packages
SSH into the Raspberry Pi, then update all packages by calling:
sudo apt update && sudo apt upgrade
3. Next Steps
Next the networking must be configured. Review the Networking page to select a networking configuration.
Supplemental Configuration
TurtleBot 4 Controller Manual Setup
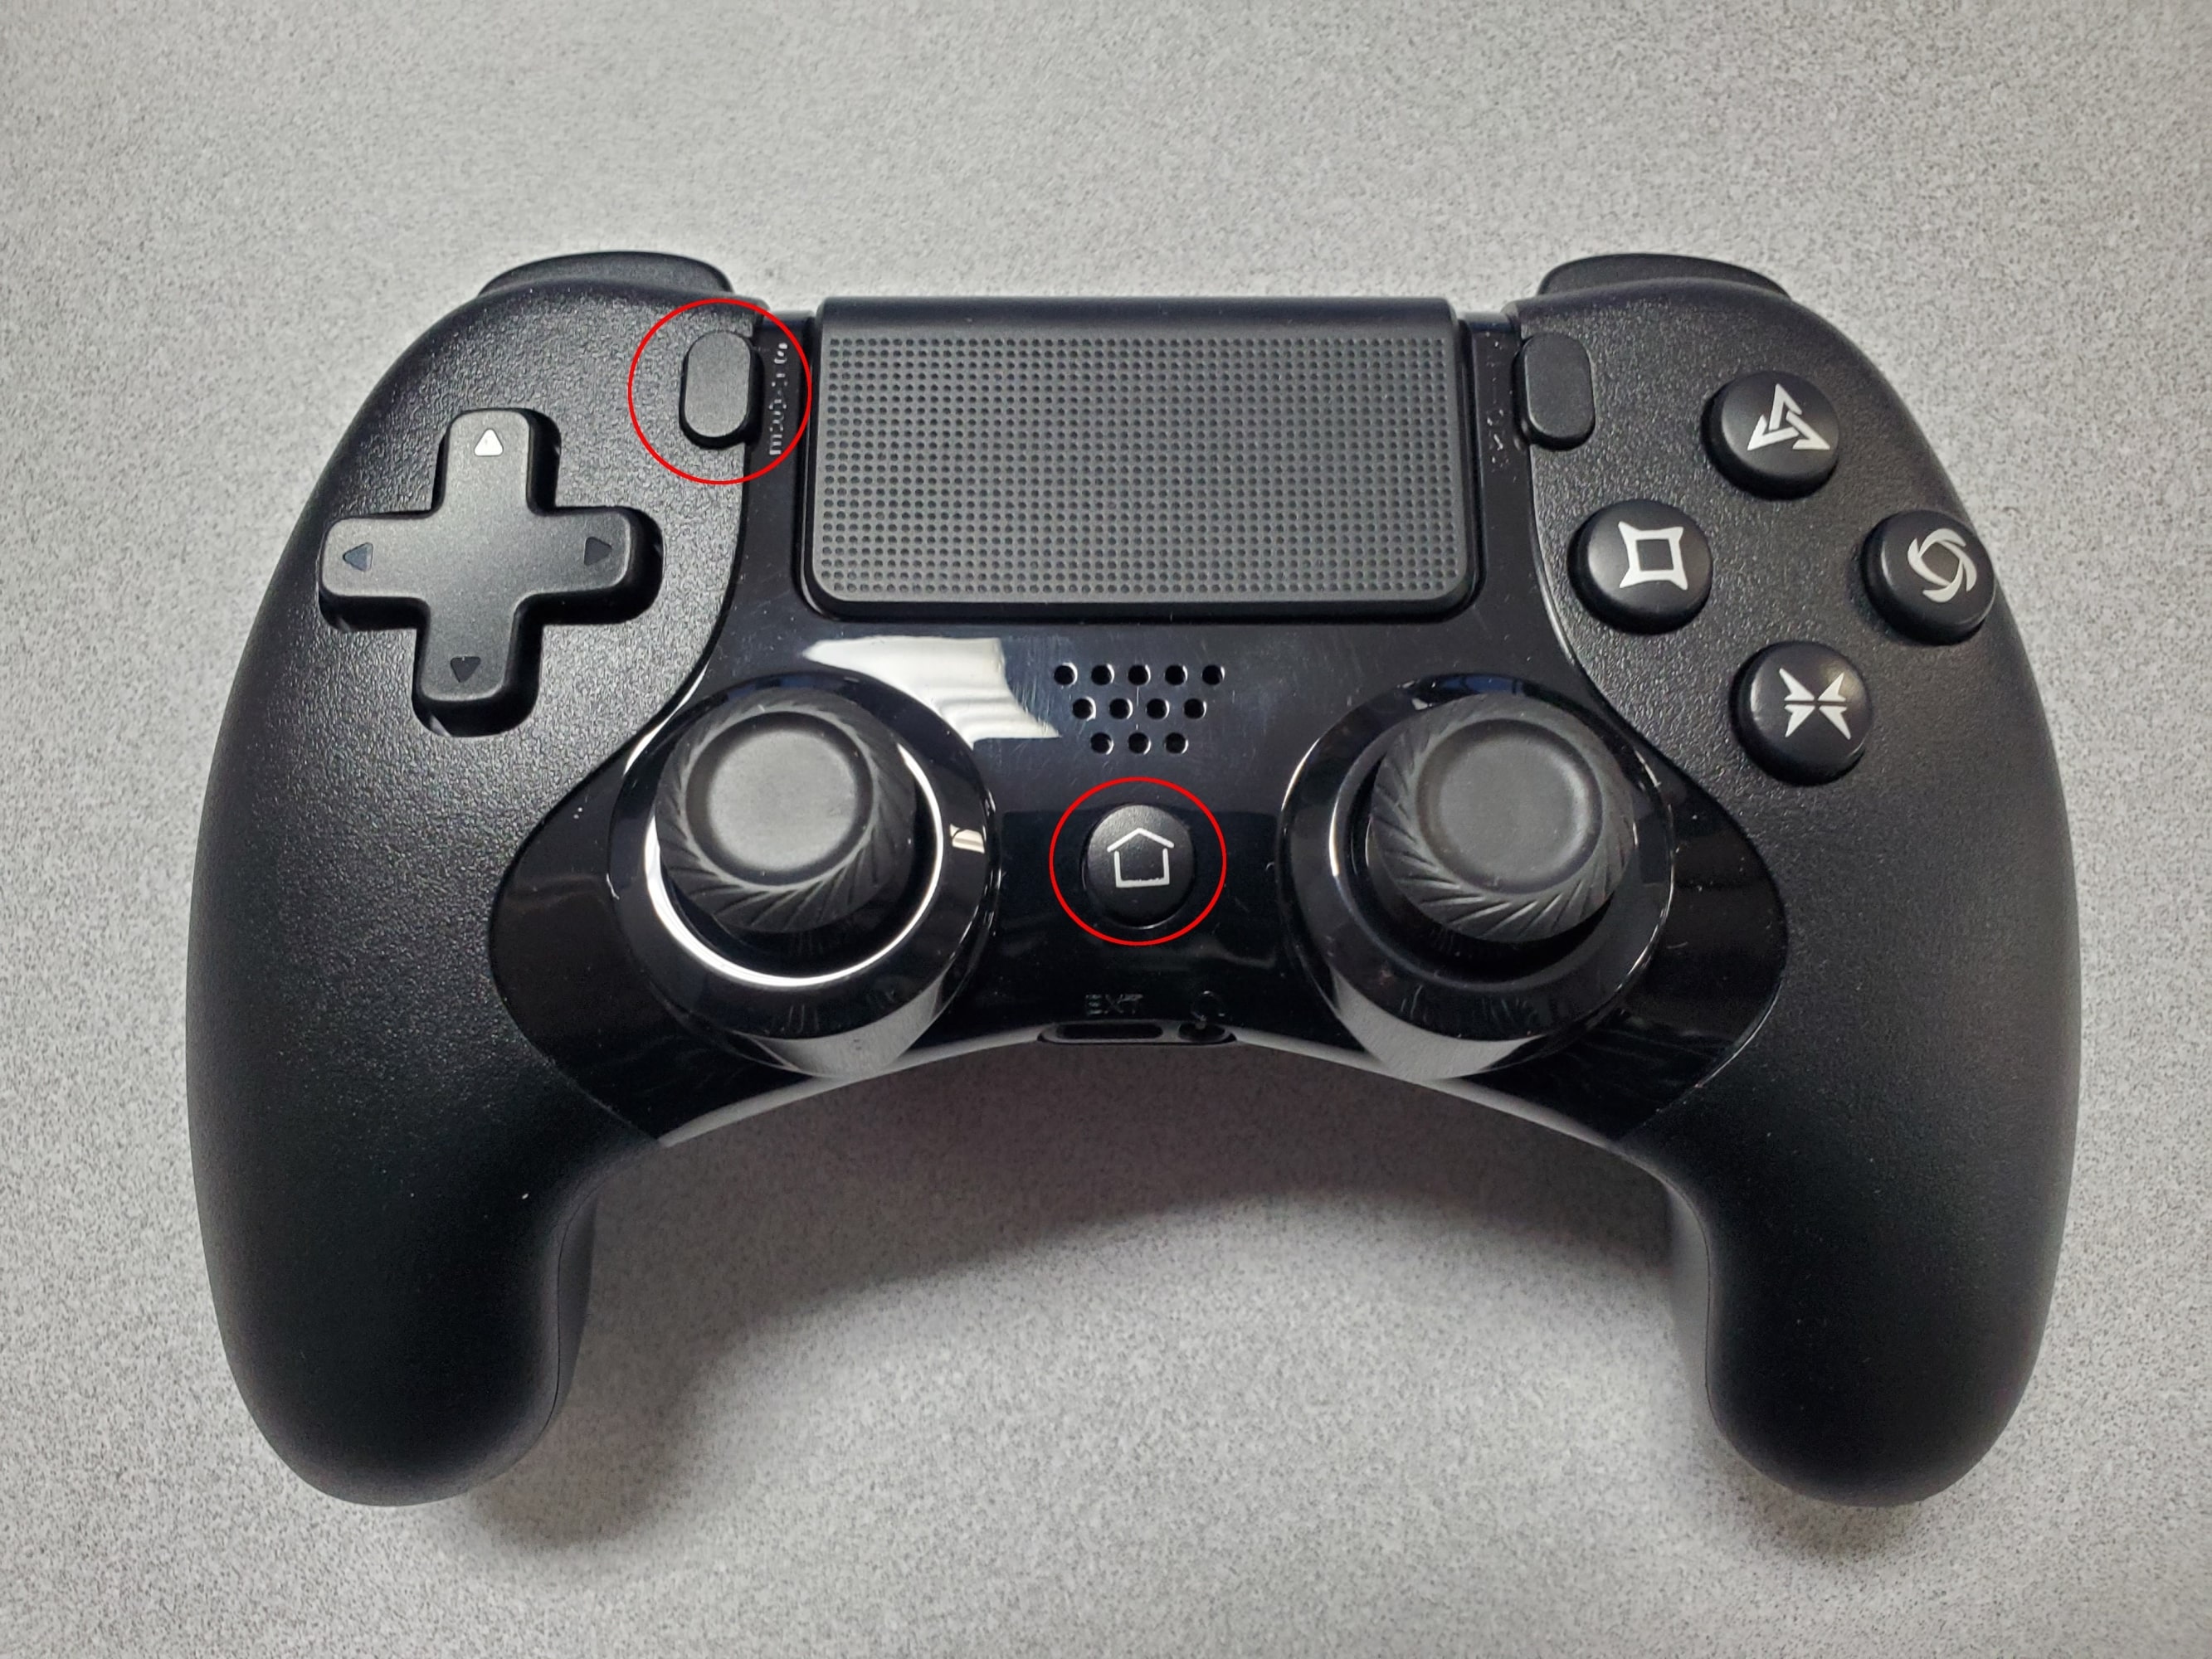
The TurtleBot 4 comes with an included TurtleBot 4 Controller. It is paired in advance with the Raspberry Pi.
If you wish to manually pair a controller, follow these instructions:
- SSH into the TurtleBot 4
sudo bluetoothctl
- The
bluetoothdCLI interface will start. - Type
scan onand press enter. - Press and hold both the home and share buttons on the TurtleBot 4 controller until the light starts blinking.
- In the CLI look for a Wireless Controller device to be found. It will have a MAC address similar to
A0:5A:5C:DF:4D:7F. - Copy the MAC address.
- In the CLI enter
trust MAC_ADDRESS, replacingMAC_ADDRESSwith the controllers address. - Then, enter
pair MAC_ADDRESS. - Finally, enter
connect MAC_ADDRESS. - The CLI should report that the controller has been connected and the light on the controller will turn blue.
- Enter
exitto exit the CLI.
Ensure that the commands are completed in quick succession. Too much delay between commands can result in the process timing out and to ultimately fail. If pairing fails then remove the device by using the untrust command followed by remove command alongside the MAC Address and try again.
Access Point Mode
Placing the Raspberry Pi into Access Point mode can be useful when using the robot in an area without Wi-Fi connection.
- Warning
ROS 2 Galactic is no longer supported. Please consider upgrading to a newer release
SSH into the Raspberry Pi and call:
sudo wifi.sh -a && sudo rebootThe Raspberry Pi will revert back to the original AP mode.
Optionally you can set your own SSID and password with:
sudo wifi.sh -s '<SSID>' -p '<PASSWORD>' -a && sudo reboot -
SSH into the Raspberry Pi and run the TurtleBot 4 setup tool:
turtlebot4-setupGo to Wi-Fi Setup and select Apply Defaults. Optionally you can set your own SSID and password before saving. Return to the main menu and select
Apply Settingsand pressEnterbefore quitting theturtlebot4-setuptool. -
SSH into the Raspberry Pi and run the TurtleBot 4 setup tool:
turtlebot4-setupGo to Wi-Fi Setup and select Apply Defaults. Optionally you can set your own SSID and password before saving. Return to the main menu and select
Apply Settingsand pressEnterbefore quitting theturtlebot4-setuptool.
If you are moving your TurtleBot 4 to a new location with a different Wi-Fi network, reconfigure the Raspberry Pi to connect to that network beforehand or place it into AP mode. Otherwise it will continue trying to connect to your current network.
Troubleshooting
Recovering the Raspberry Pi
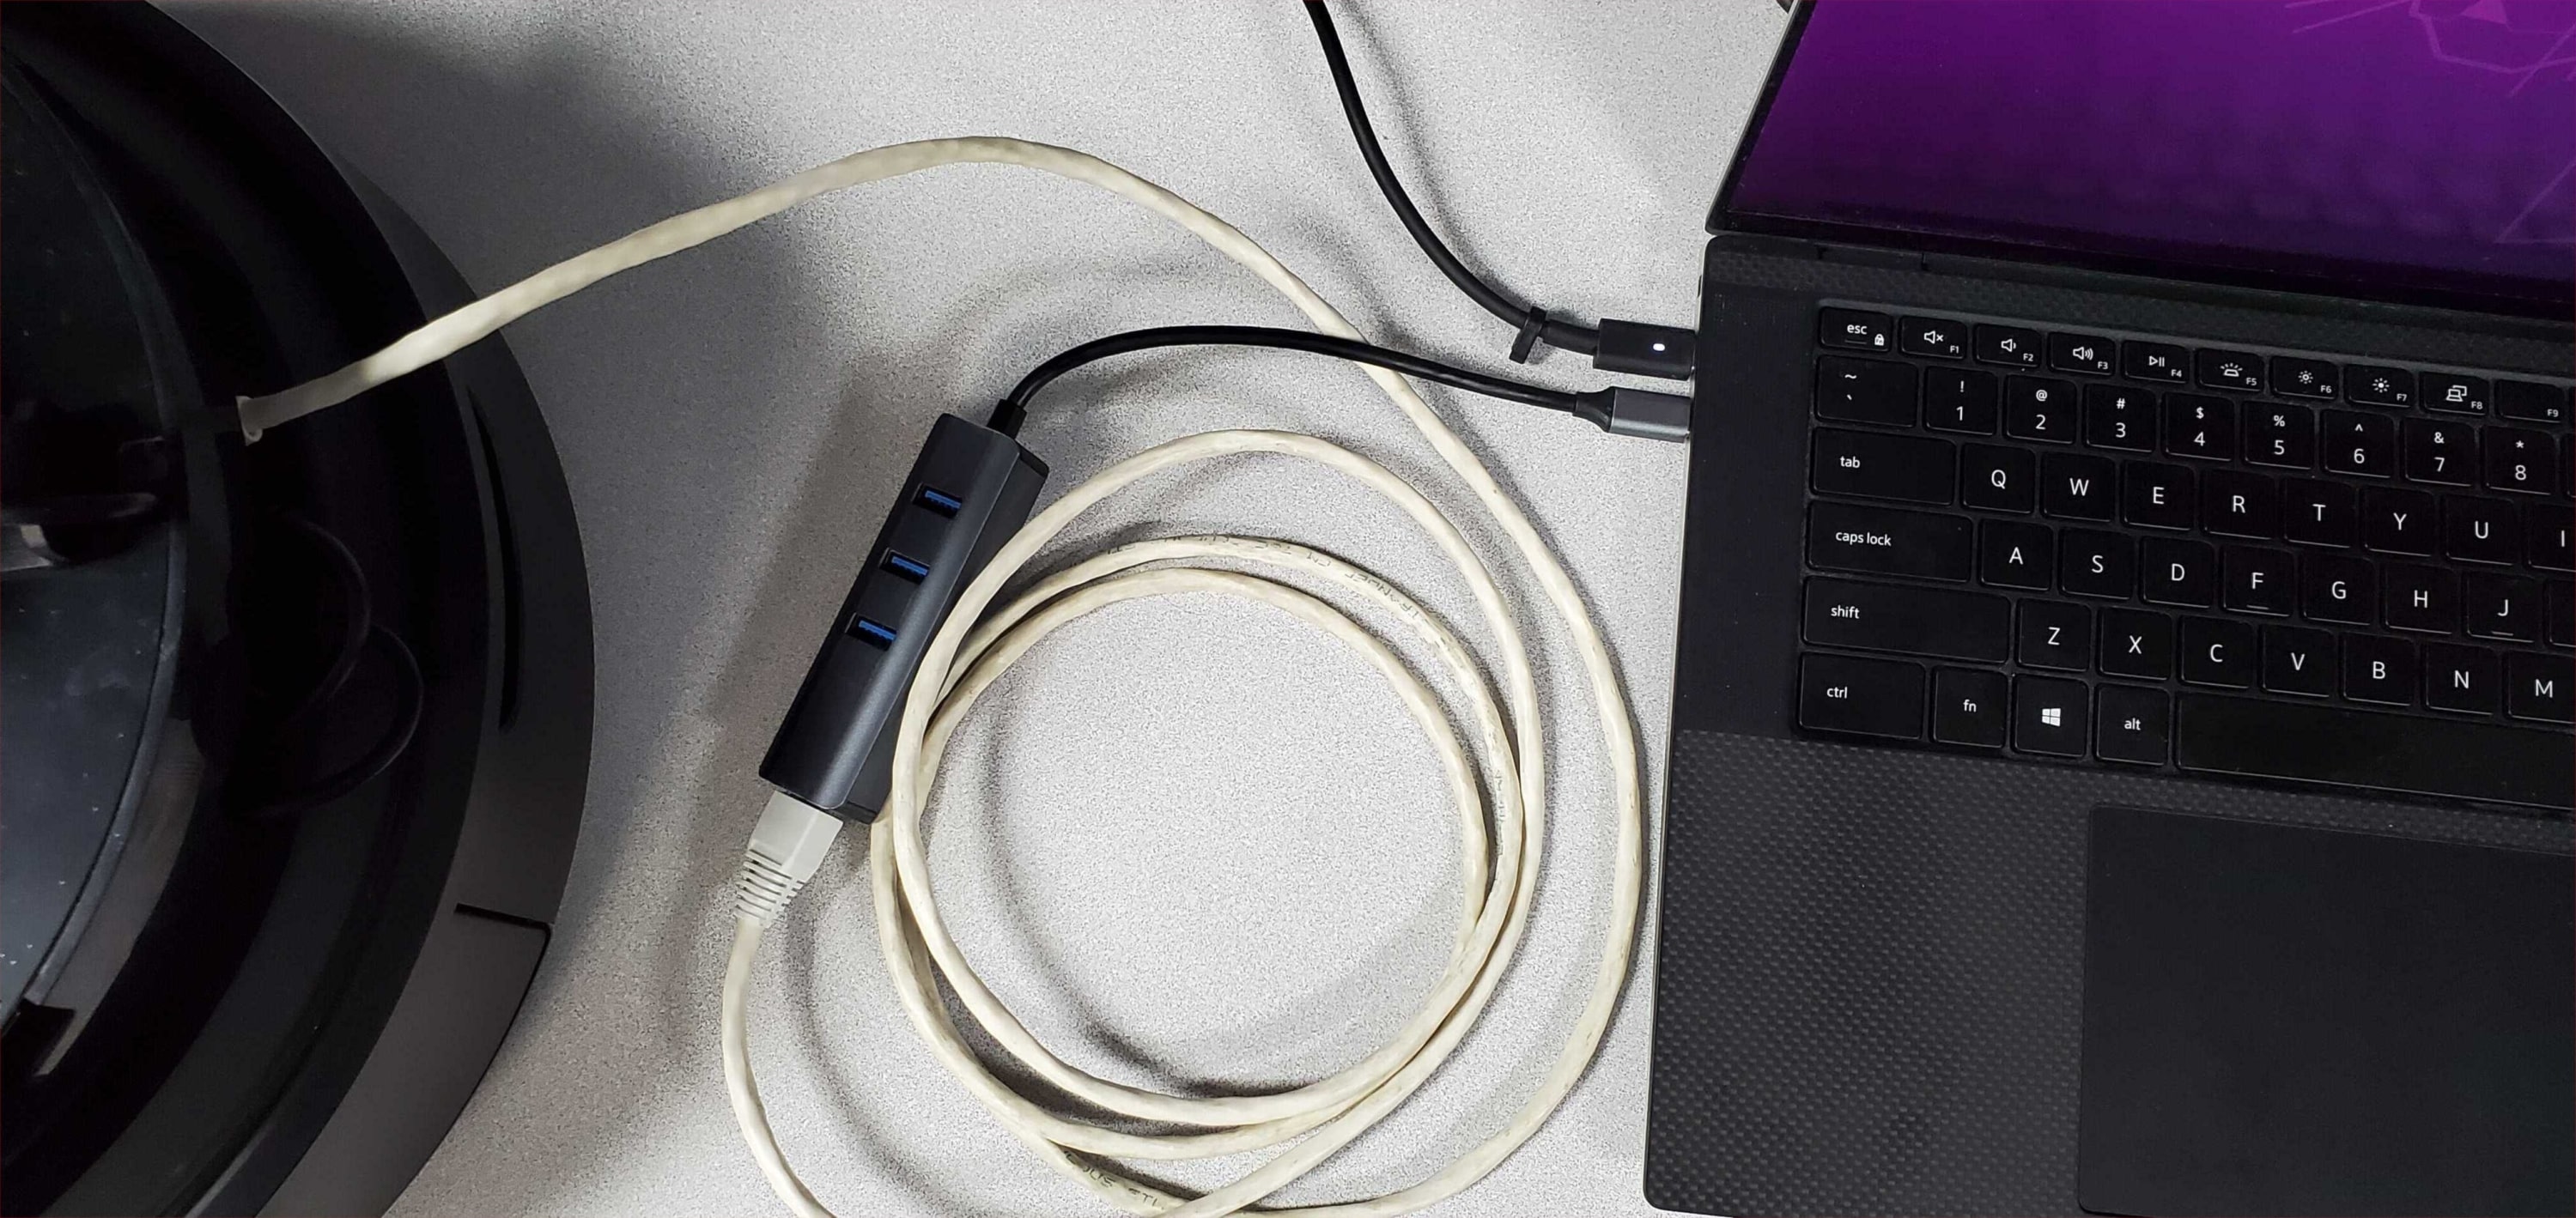
If you entered incorrect Wi-Fi credentials or your Wi-Fi network is down, you will not be able to access the Raspberry Pi over Wi-Fi. To recover from this, you can connect directly to the Raspberry Pi using an ethernet cable. You may need a USB to Ethernet adapter for your PC.
The Raspberry Pi uses a static IP address for the ethernet interface, 192.168.185.3. You will need to configure your wired connection to use the same subnet:
- Go to your wired connection settings.
- Set your IPv4 Method to
Manualand set your static IP. The IP address cannot be the same as the Raspberry Pi.
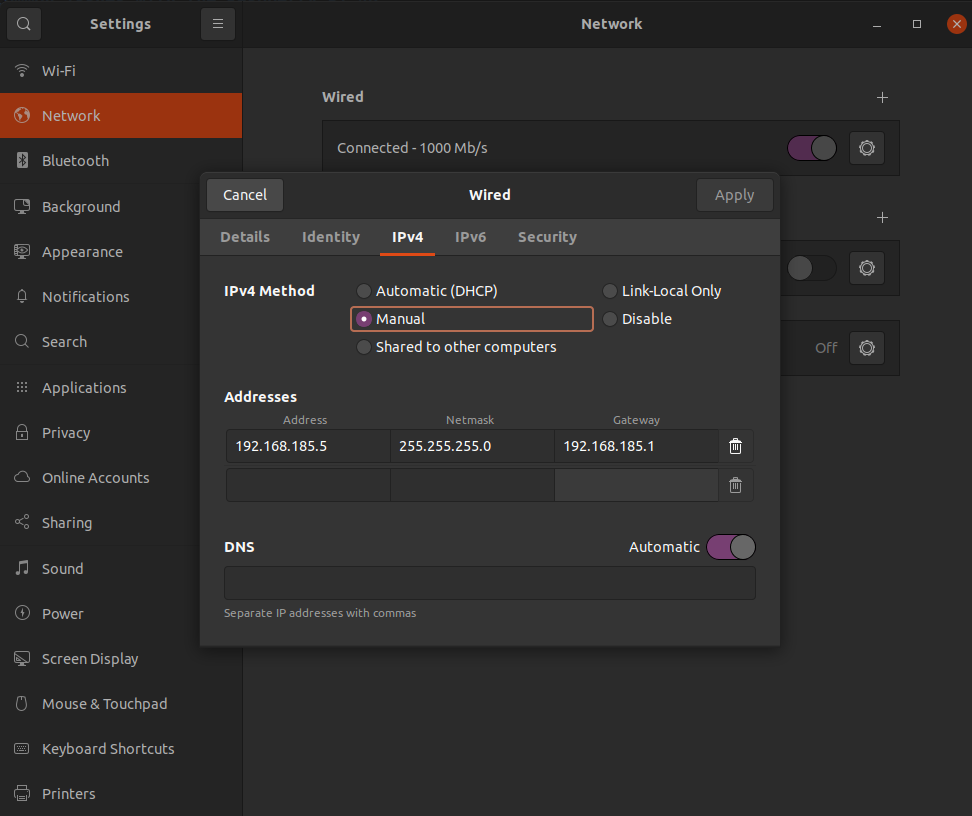
- Click ‘Apply'
You can now go to your terminal and SSH into the robot by typing:
ssh ubuntu@192.168.185.3
Install latest Raspberry Pi image
Resetting to a fresh Raspberry Pi image allows complete resetting of the Raspberry Pi. This is suggested if the system has been modified in a way that has corrupted the wired connection or general operating system.
Installing a new image on the Raspberry Pi will delete any changes you may have made. Save your changes externally before proceeding.
Find the latest TurtleBot 4 Raspberry Pi images at http://download.ros.org/downloads/turtlebot4/.
- Download the latest image for the given ROS distribution and robot model.
- Extract the zip file to get the
.imgfile - Power off your robot and then remove the microSD card from the Raspberry Pi.
- Insert the microSD card into your PC. You may need an adapter.
- Install the imaging tool
dcfldd
sudo apt install dcfldd
- Identify your SD card by running
lsblk -d -e7
-
The SD card should have a name like
mmcblk0orsdb. -
If you wish to backup your current image, do so now:
sudo dd if=/dev/<SD_NAME> of=<IMAGE_PATH> bs=1M
SD_NAME is the device name (mmcblk0, sda, etc.).
IMAGE_PATH is the path to where you want the image saved – e.g., ~/turtlebot4_images/backup_image.
- Get the SD flash script from
turtlebot4_setupand flash the SD card:
- Warning
ROS 2 Galactic is no longer supported. Please consider upgrading to a newer release
wget https://raw.githubusercontent.com/turtlebot/turtlebot4_setup/galactic/scripts/sd_flash.sh bash sd_flash.sh /path/to/downloaded/image.img -
wget https://raw.githubusercontent.com/turtlebot/turtlebot4_setup/humble/scripts/sd_flash.sh bash sd_flash.sh /path/to/downloaded/image.img -
wget https://raw.githubusercontent.com/turtlebot/turtlebot4_setup/jazzy/scripts/sd_flash.sh
bash sd_flash.sh /path/to/downloaded/image.img
- Follow the instructions and wait for the SD card to be flashed.
- Remove the SD card from your PC.
- Ensure your Raspberry Pi 4 is not powered on before inserting the flashed SD card.
- Follow the Robot Setup to configure your TurtleBot 4.