Generating a map
In this tutorial we will be mapping an area by driving the TurtleBot 4 around and using SLAM. Start by making sure that the area you will be mapping is clear of unwanted obstacles. Ideally, you don't want people or animals moving around the area while creating the map.
Launch SLAM
Remember to always source your ROS 2 environment before trying to launch a node.
- Warning
ROS 2 Galactic is no longer supported. Please consider upgrading to a newer release
First, install
turtlebot4_navigation:sudo apt install ros-galactic-turtlebot4-navigationThen run SLAM. It is recommended to run synchronous SLAM on a remote PC to get a higher resolution map.
ros2 launch turtlebot4_navigation slam_sync.launch.pyAsynchronous SLAM can be used as well.
ros2 launch turtlebot4_navigation slam_async.launch.py -
First, install
turtlebot4_navigation:sudo apt install ros-humble-turtlebot4-navigationThen run SLAM. It is recommended to run synchronous SLAM on a remote PC to get a higher resolution map.
ros2 launch turtlebot4_navigation slam.launch.pyAsynchronous SLAM can be used as well.
ros2 launch turtlebot4_navigation slam.launch.py sync:=falseTo change map resolution or other SLAM parameters, copy the default config and modify it. Then, pass the parameters in as a launch argument.
ros2 launch turtlebot4_navigation slam.launch.py params:=/full/path/to/slam.yaml -
First, install
turtlebot4_navigation:sudo apt install ros-jazzy-turtlebot4-navigationThen run SLAM. It is recommended to run synchronous SLAM on a remote PC to get a higher resolution map.
ros2 launch turtlebot4_navigation slam.launch.pyAsynchronous SLAM can be used as well.
ros2 launch turtlebot4_navigation slam.launch.py sync:=falseTo change map resolution or other SLAM parameters, copy the default config and modify it. Then, pass the parameters in as a launch argument.
ros2 launch turtlebot4_navigation slam.launch.py params:=/full/path/to/slam.yaml
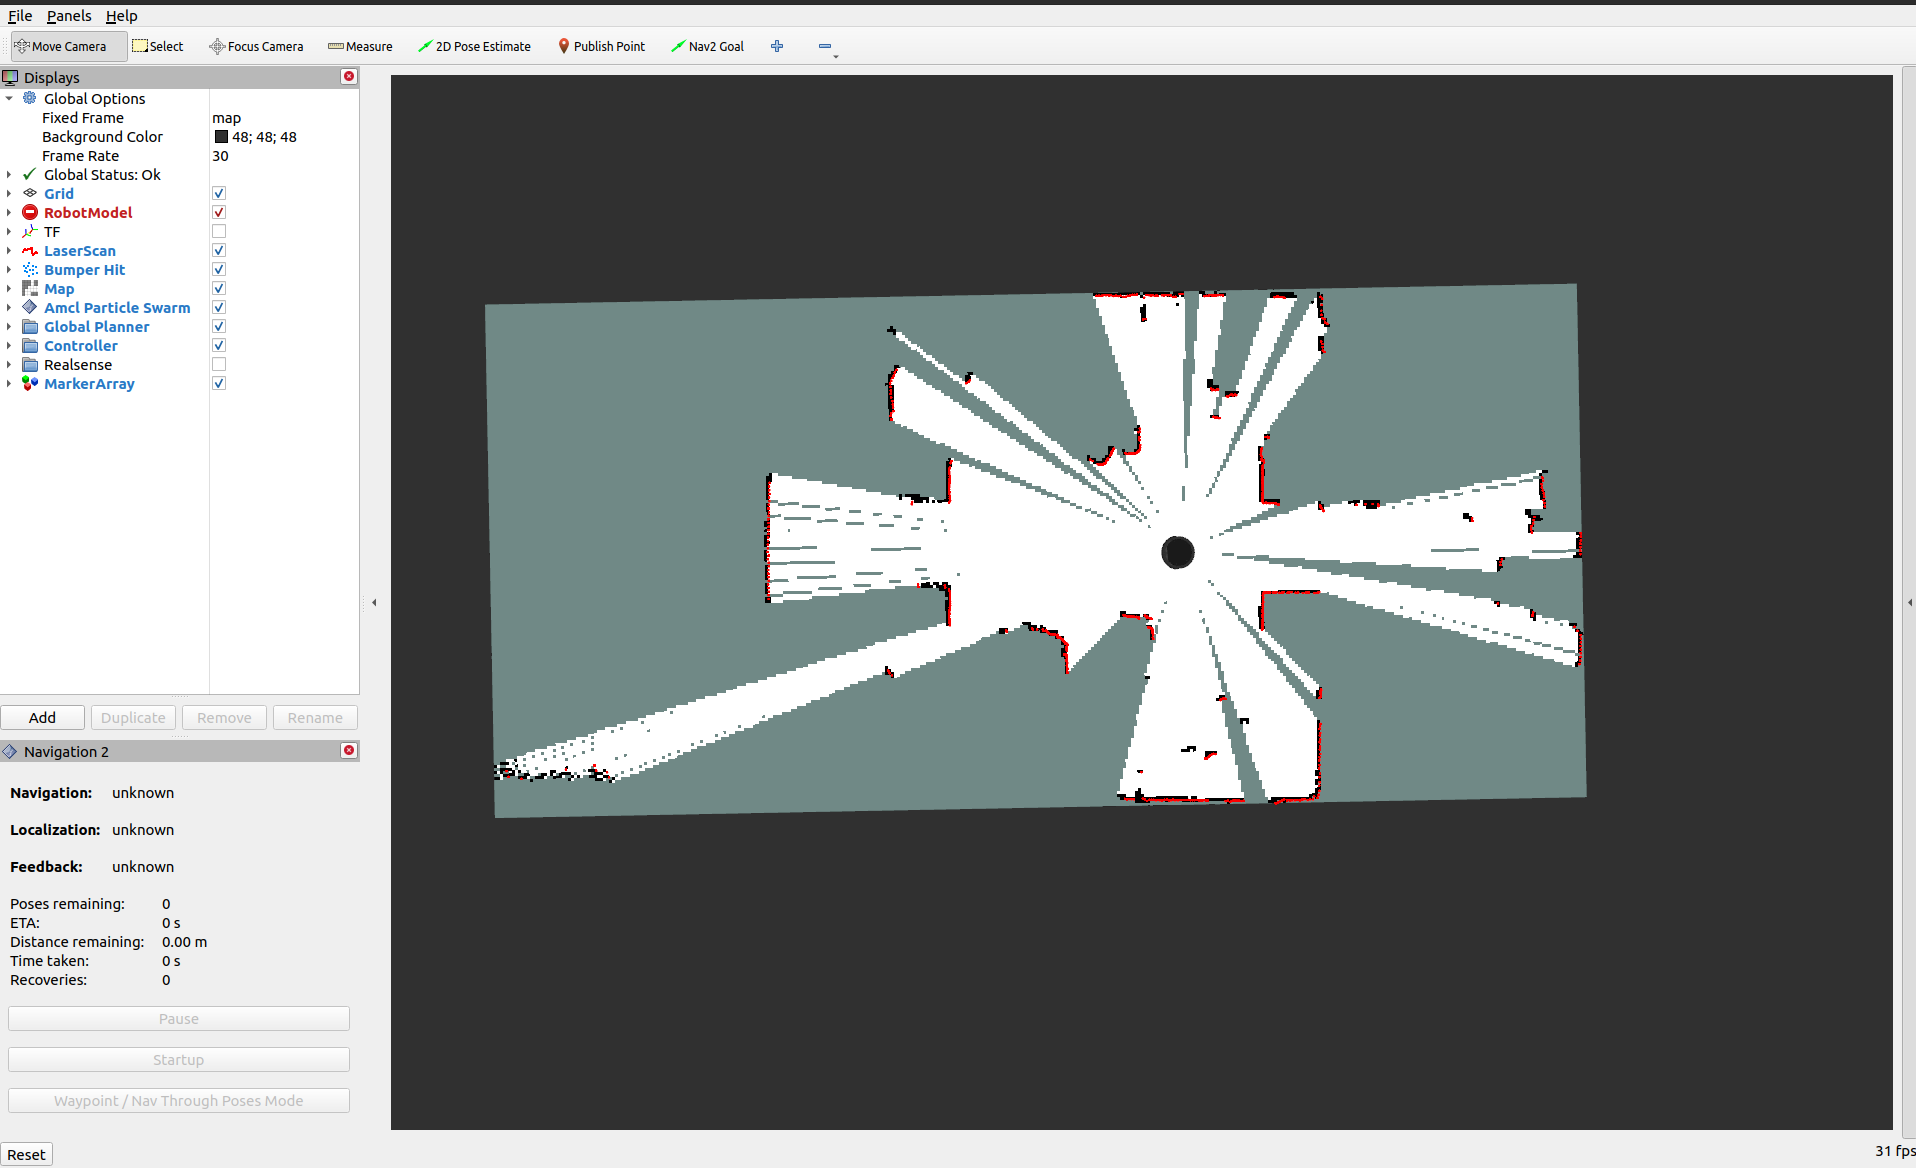
Launch Rviz2
To visualise the map, launch Rviz2 with the view_robot launch file on the user computer. This requires a desktop version of Ubuntu with a display and therefore cannot be run on the robot itself.
- Warning
ROS 2 Galactic is no longer supported. Please consider upgrading to a newer release
ros2 launch turtlebot4_viz view_robot.launch.py -
ros2 launch turtlebot4_viz view_robot.launch.py -
ros2 launch turtlebot4_viz view_navigation.launch.py
Drive the TurtleBot 4
Use any method to drive the robot around the area you wish to map. Check out the driving tutorial if you are unsure of how to drive the robot.
Keep watch of RVIZ as you drive the robot around the area to make sure that the map gets filled out properly.
Save the map
Once you are happy with your map, you can save it with the following command:
ros2 service call /slam_toolbox/save_map slam_toolbox/srv/SaveMap "name:
  data: 'map_name'"
If you are using namespacing, you will need to call the map saver tool directly: ros2 run nav2_map_server map_saver_cli -f "map_name" --ros-args -p map_subscribe_transient_local:=true -r __ns:=/namespace
This will save the map to your current directory.
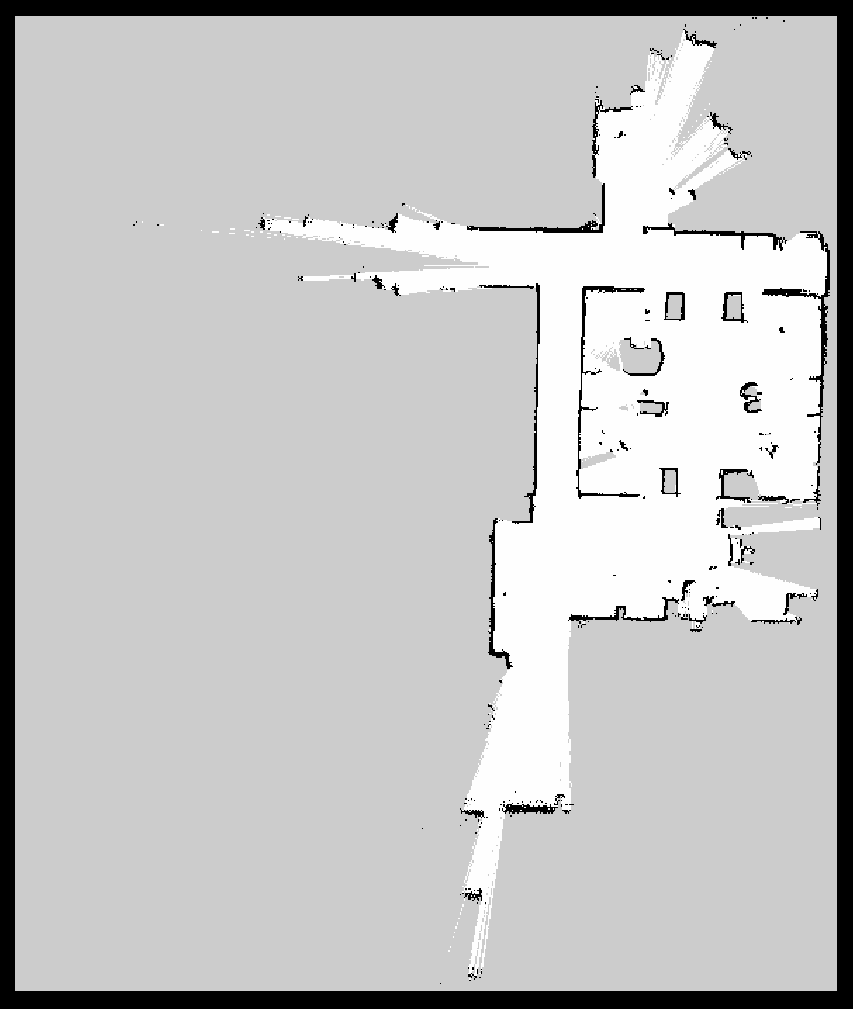
View the map
Once the map is saved it will generate a map_name.pgm file which can be viewed in an image editor. A map_name.yaml file is also created. You can edit this file to adjust the map parameters.